Pages

Tuesday, December 14, 2010

"Vintage" Christmas Stockings

A couple years ago, Pam Garrison posted photos of a Christmas stocking she had made for her son.  Ever since then, I've had it in my mind to make similar stockings for our family.  I've been collecting vintage holiday felt bits and bobs, and decided to tackle the project this year!  Here are the results!


Each one is comprised of some vintage bits from old stockings or old appliques and some new cutouts that I did.  I have to admit that I took the easy way out and glued most things down instead of sewing, so I'm crossing my fingers they'll hold up!  If not, I can always go back and stitch them down at a later point.

I hope it's not too big-headed to say that I absolutely LOVE the way these turned out!!!  The colors and the vintage handmade look were exactly what I was going for!  If you're interested to see a few more shots, as well as some closer looks at the individual stockings, they're on my Flickr page....

We also have some cross-stitched stockings that my mother-in-law made, so I'm going to have to go shopping for more stuff to fill TWO stockings for each kid now- ha ha!

Hope everyone's holiday season is going well!

Thursday, December 09, 2010

The New Playroom

Hello, welcome to our new playroom!  For Riley's fifth birthday he got bunk beds, which meant that both boys now share a room, leaving Riley's old room free.  Many elements you may remember, as I was able to keep the same paint, curtains, some furniture, etc. 

Let me take you on a tour (there are also more photos on my Flickr site, due to my uploading problems on the blog, so check them out as well)!


This is a little shelf that houses two vintage pieces of needlework.  I found them both while in the process of putting together the room, and they're really perfect for the playroom!

I'll start from the left wall, as you enter, then travel around clockwise...  That red bookshelf is one of only two pieces I had to buy to do the room (from Ikea).  Everything else I already had, in various other rooms.  Above the bookshelf is a wonderful vintage coloring book entitled "Playroom" that I purchased from Elizabeth Holcombe- perfect!!  Close-up photos of it are on the Flickr site... 

Artwork (pages from vintage cloth books) and curtains were all part of Riley's old decor...

The majority of the storage is all along one wall.  The bottom units are also from Ikea (called Trofast), and I already had two, so just had to purchase one extra.  There's just enough room between them to hold a little Lego table we had.  And the top white units I already had as well (purchased at A.C. Moore).  We put up two shelves between them (again, we already had them) for extra storage.

And by the way, yes, we should purchase stock in Fisher Price Imaginext toys!!!

A couple days after I took the original photos, I made this little banner to hang over the storage wall, which is why you don't see it in the other shots.  I simply took a couple of vintage cloth books apart, and sewed the pages into a strip of red seam binding.

And that's it!  I think this is the easiest room re-do I've done, and everything just worked out beautifully!  Everything fit and matched and turned out great, which was a great relief.  And the kids are adjusting really well to the change.  We used to have toys scattered throughout the house, and it's so nice to have a place for them all in here.  And there's room to grow, so once Avery starts accumulating lots of toys, she'll have space for them in here as well.

I hope you've enjoyed the tour.  Again, take a look at Flickr for some more detailed shots and a few other views as well!

Friday, December 03, 2010

The Play Kitchen(s)

Well, so I've definitely figured out my photo problem on Blogger.  If I shoot my photos horizontally, then things work fine, but if I shoot them vertically, they're close to impossible to edit in here.  The problem is that I usually take most photos vertically!  But, in instances where I know I'll be blogging, I'll make a point to shoot horizontally, such as in this case. 

So, one thing I'm always on the lookout for while thrifting is a vintage play kitchen.  For a while we had a modern plastic kitchen with the boys, but it just didn't hold their interest.  I decided that when Avery was old enough, she should have a nice wooden kitchen, preferably vintage.  Well, I never seemed to run across a vintage one, and I've seen such an assortment of cute homemade kitchens out in blogland, that I was willing to give it a go.

Allow me to introduce you to The OLD Play Kitchen, purchased for $5 (at 75% off) from a thrift store:

Cute enough, but in need of some repairs, and a little too pastelly/cutesy for my tastes.  But I couldn't pass up the price for a wooden kitchen.  Plus, I like that it is fairly small, and  has both oven space as well as refrigerator space.  And I could see that it definitely had Potential with a capital P!

So, now allow me to introduce you to The NEW Play Kitchen:


Ta-Dah!

 I even thrifted some storage containers to organize things on the inside!


As you can see, the changes were pretty easy for such a dramatic makeover.  New paint, new hardware, a pretty little curtain, a pretty little decal, and a new oven door (courtesy of my husband).


The "oven knobs" were in the clearance bin at Anthropologie for $3 each, and were pretty much exactly what I had in mind! Red and vintage-looking!


 I am absolutely thrilled with the results!  If you head over to my Flickr page, there are a few photos of the kids playing with the kitchen (they were shot vertically, so won't work here!).  I had intended to save it as a gift for Avery for Christmas, but there really wasn't any place to store it for a month, so what the heck!


And so, you thought my story was done there, didn't you?  So did I, frankly. We have an adorable little kitchen that both my husband and I put lots of love and work into, and the kids seem to love it.  That's just what I wanted, right?  But, oh, wait, what's that behind my little blue kitchen in the above photo???


Ummmm, yeah.... another play kitchen....


As luck would have it, not two weeks after finishing the little blue kitchen, what should I come across at Goodwill but this wood kitchen for $7?!?  If I had dreamed up a vintage wooden play kitchen, it couldn't have looked more perfect than this!  Absolutely exactly what I would have wanted!   There's no way I couldn't buy it, is there?  You guys are with me on this one, aren't you?  (If you are, let me know, because at this point, my husband really thinks I'm crazy!)


What a dilemma! 


Very luckily for me, my parents just bought a house in town, and my mother offered to keep one of the kitchens at her house.  Whew!  Because, honestly, I really don't think I could have parted with one!  Now, I just need to decide which one goes where, which is no easy task either, but at least I can change my mind if I decide I miss one! 

Well, I hope you enjoyed my long-winded adventure there!  I still need to post photos of some of my other projects- our new playroom and shared bedroom for the boys.  Both turned out great, and I'm excited to show them off!

Hope you're all having a great season so far! 

Thursday, November 25, 2010

Getting Better?

2007

2008

2009

2010

Well, as soon as we added another kid to the mix, we added another crier, it seems! That poor Santa- he's going to start running when he sees us!  Maybe by the time they're all five, we'll get a good Santa picture!

(I know I said I wasn't going to post here anymore, but these photos uploaded properly since they were taken with a different camera.  Seems my new camera is the reason my pictures all come up sideways...)

Happy Thanksgiving, Everyone!

Sunday, November 07, 2010

Sorry....

Hi Guys, I'm sorry, but I think I'm done with blogging here for a bit.  Blogger just really SUCKS, and it's becoming too difficult to deal with. Lately, all of my photos are uploading sideways, with no way of editing them without a LOT of extra work, and I just don't have the time to mess with the constant problems I always have with Blogger!  If it's not one thing, it's another! 

Until further notice, I will be putting all my stuff up on Flickr, and adding descriptions there, instead of doing it here.  Please don't abandon me!  This doesn't mean that I am just out of the picture.  I will actually probably post more photos this way, because Flickr is so much easier to deal with!  And when I've got some time, I may investigate another blog site...

So head on over to my Flickr site.  I've posted a cute bow holder that I made from an Anthro dishtowel!

Sunday, October 24, 2010

A Little Organization

I've got an odd little wall in our kitchen that can't take a tall piece of furniture because of the light switch in the middle of the wall.  I've also got two kids in preschool (who bring home LOTS of paperwork) and my own miscellaneous papers to deal with.  It was time to do something about it!


I already had the chest from HomeGoods, which holds kitchen things, but I needed something functional on the wall above it for all the paperwork.  I found these file boxes at Target.

The file boxes were from the Martha Stewart Living collection, but I can't find any photos online to show what they originally looked like...  But anyway, they were originally just solid colors- teal, green, and brown. 

I covered them in scrapbook papers, and added little nameplates to the front.  My husband put grommets on the top so that they'd hang on the wall.

 They each have three "slots" for papers or files, etc.- plenty of room!

 I also bought some coordinating decorative file folders from Tuesday Morning to further organize each "slot".


So now I've got something that is functional, pretty, unique, and fits around the random light switch!

Thursday, October 21, 2010

Journal Pages Roundup

I haven't been keeping up with my kids' journals as much as I'd like lately, but I've managed a few pages in the last couple months.  Here they are!

In Avery's journal:
    
A spread about learning to crawl.  She's been crawling for a while, but I'm still waiting to do the "walking" page!  She's taking 7-8 steps at a time, but won't give up the crawling yet!  I guess I shouldn't complain- with my last baby, I shouldn't want her to grow up too quickly!

A spread about her baptism.  The baby in the cradle is from a vintage baptism card, and the cross above it is from the card my mom gave to her. 

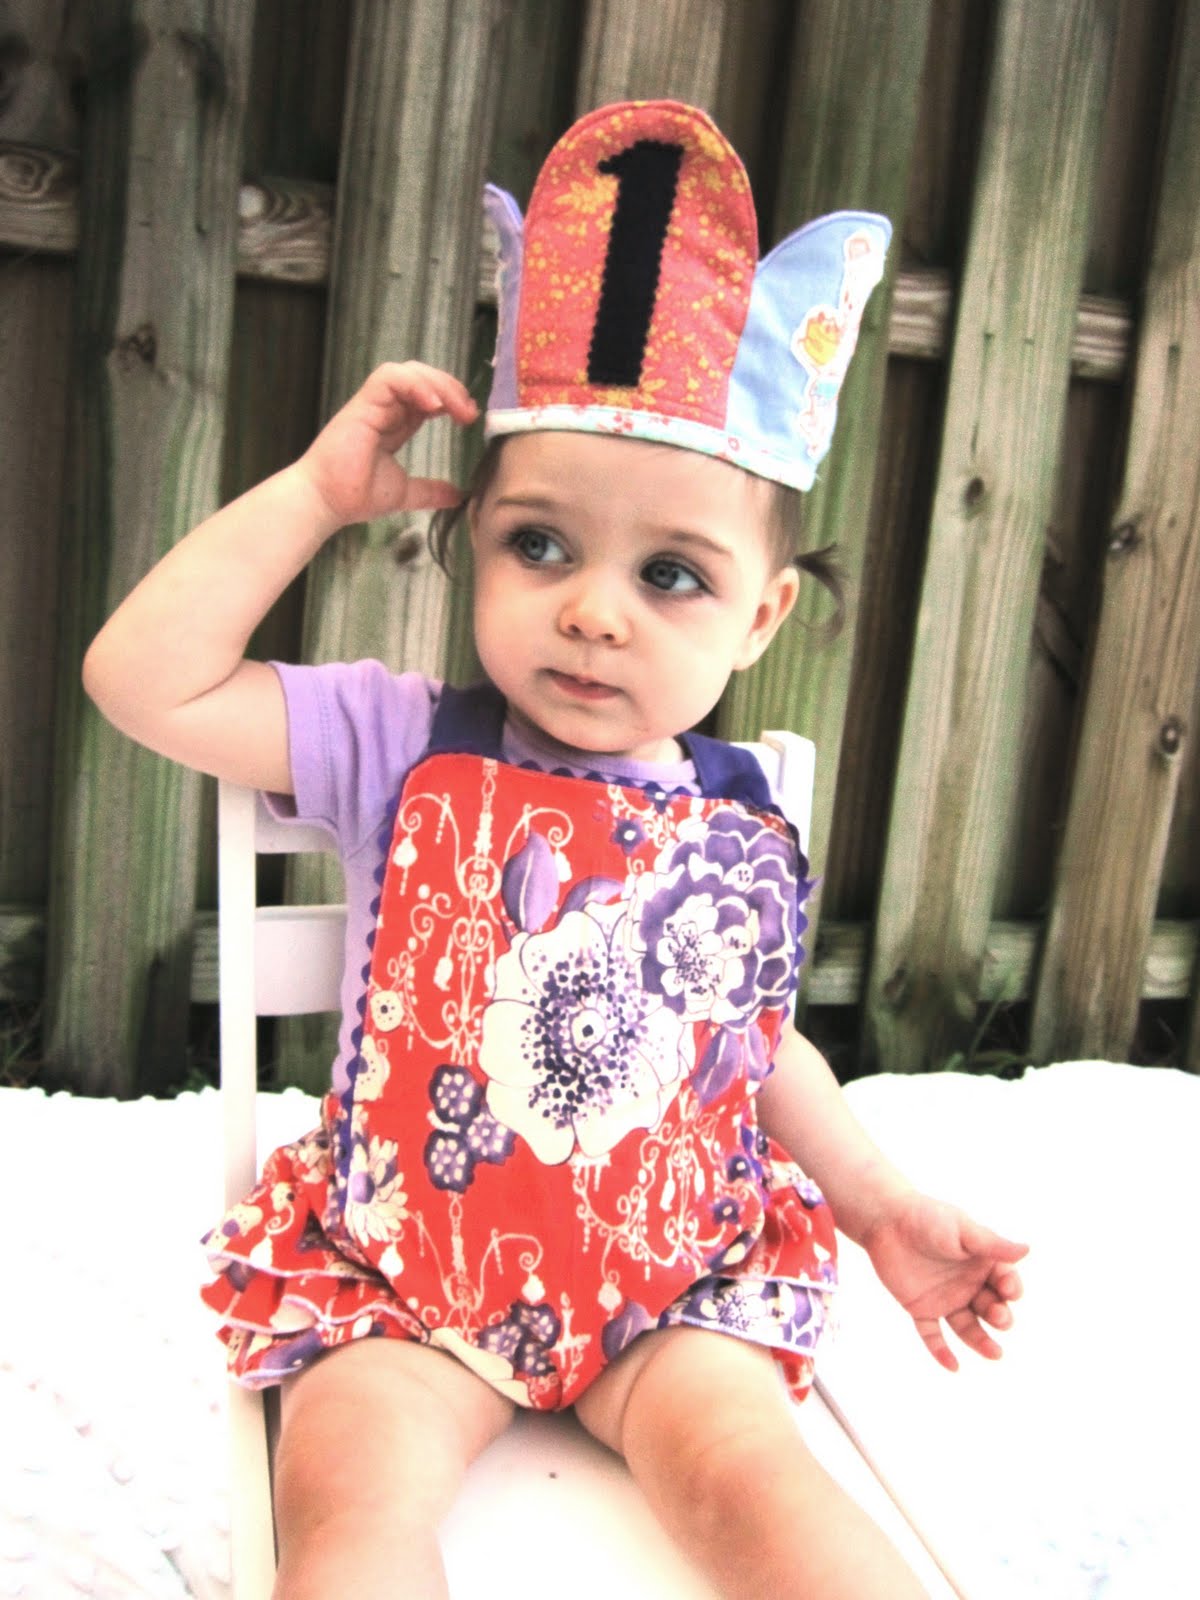
Her first birthday spread.  I love these pages!  I used wrapping paper from her presents, and the little girl image was sitting out as a decoration.  As you can see, I love to use mementoes from events in my journals...

And another about her first birthday.  As I detailed a couple posts ago, I kind of obsessed about what she should wear for her birthday.  That also extended to what she should wear for her first birthday "formal" photos at the studio.  These were the two final choices- I used fabric from the outfits (scrap-I didn't cut up the outfits!) as the "lines" for my journaling.

In Riley's Journal:
 
Poor Riley's journal has really been neglected this year, but I guess that just happens as kids get older and don't reach as many "milestones".  But I do try to document big events in his life, like learning to swim!
 
And turning 5!  His birthday was this past weekend.  We had a pirate party (his first real birthday party), and I used mementoes from the party on his pages.

In Noah's Journal:

This spread is about Noah learning to write his letters.  If you can decipher it, that says "N-O-A-H" over there!

I still have lots of vintage finds to show you, and two new decorating projects.  For Riley's fifth birthday, the boys got bunk beds, so I've been decorating a new shared bedroom, as well as turning Riley's old bedroom into a playroom.  When I have some more time, I'll show you!

Wednesday, October 06, 2010

Doll Dresses

Well, I was prepared to show you a few pictures of some new decor in my studio, but Blogger is uploading half my photos sideways for some reason.  So you can head over to my Flickr page if you'd like to see some more detailed photos...

But anyway, I've recently acquired some things that required me to do a little rearranging.   I found the dusty pink knick-knack shelf (towards the left side of the top photo) at an antique shop, and I purchased the pile of vintage doll dresses on Ebay.  So down came some of my old stuff to make room for the "new" stuff!


You can see photos of the old wall arrangement here.  I know, it's not a big change (in fact, my husband couldn't even figure out what I changed, even with prompting!), but I do love those doll dresses so!  I've recently been on a little bit of a vintage doll kick.  Above are a few of my vintage dolls, and I'll show you some others soon.  And don't even get me started on vintage doll furniture- I really need a support club for that one...!

Head over to Flickr if you want to see a couple more photos, including one of a great thrift store find!

Wednesday, September 22, 2010

Look Who's One!

Yes, this little girl is now one!  And proud as can be, as you can see!  On the morning of her birthday, I took her outside for a little birthday photoshoot, and here are some of the results.

I obsessed (and I mean really obsessed!) about what she would wear on her first birthday.  Funny, I never really thought much about it with the boys, but oh my, this little girl was going to have the perfect outfit on her birthday!  I had just about given up hope of finding something suitable, when I came across this seller on Etsy.  I fell in love with these little ruffled sunsuits she makes, and found my girl's birthday outfit!  As you can see, I also made a matching birthday crown for her to wear!

I've been trying out the pigtails on her, but they only last for so long!

Oh my, how cute is that ruffled bum???


And here was her party.  It was just a few family members, but I wanted to decorate just the same.  Something about the fact that this was going to be my last "first" birthday party.... sniff!
Most of my family thought I was nuts for hanging sheets and blankets up on the walls, but I wanted a pretty backdrop for everything, as I'm sure you all can relate to!

Not sure that you can see it very well, but I made a bunting with vintage embroideries of birthday girls on the flags to hang on the wall.


My sister and her boyfriend made the cake-isn't it gorgeous?  And yummy, too!

And here's the birthday girl eating her cake.  None of my kids are the sorts to dive in and make a huge mess, so this was as messy as it got!

It goes without saying that she got plenty of dolls and strollers and baby carriages on her special day, including this doll I had made for her.  She's slowly but surely starting to show interest in her dolls, so I hope to have the opportunity to make lots more for her!